
Knife sharpening transforms dull blades into precision tools, enhancing kitchen efficiency and safety; mastering this skill unlocks a world of culinary possibilities․
Sharpening isn’t merely about aesthetics; a sharp knife requires less force, reducing the risk of slips and injuries during food preparation, ensuring control․
Always prioritize safety—secure your knife and maintain focus while sharpening, utilizing protective gear when necessary to prevent accidental cuts or damage․

Why Knife Sharpening Matters
A truly sharp knife is paramount, extending far beyond simply achieving a clean cut․ Dull knives demand significantly more pressure to perform basic tasks, dramatically increasing the likelihood of slipping and causing serious injury․ This inherent danger makes regular sharpening a crucial safety practice in any kitchen environment․
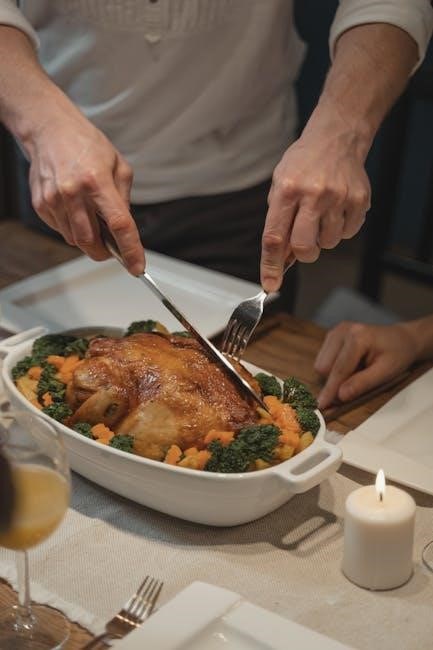
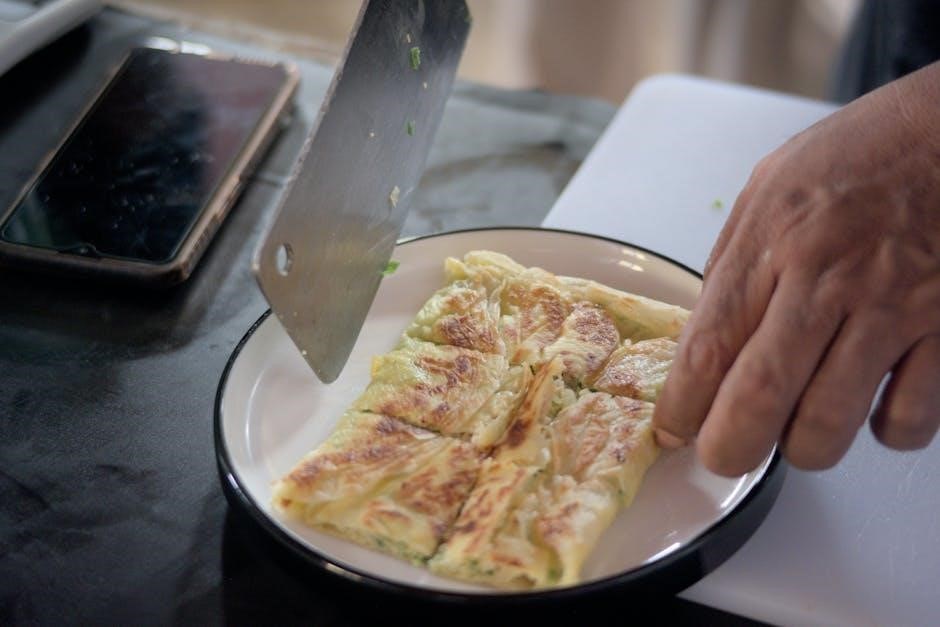
Beyond safety, a sharp knife elevates the entire cooking experience․ Effortless slicing, dicing, and mincing not only save time and energy but also preserve the integrity of ingredients․ Delicate herbs won’t bruise, tomatoes won’t squish, and meats won’t tear – resulting in beautifully presented and flavorful dishes․
Furthermore, maintaining a sharp edge extends the lifespan of your knives․ Constant forcing against resistance with a dull blade causes microscopic damage, leading to premature wear and tear․ Sharpening restores the edge, preventing further deterioration and protecting your investment in quality cutlery․ It’s a proactive approach to knife care, ensuring years of reliable performance․
Safety Considerations When Sharpening
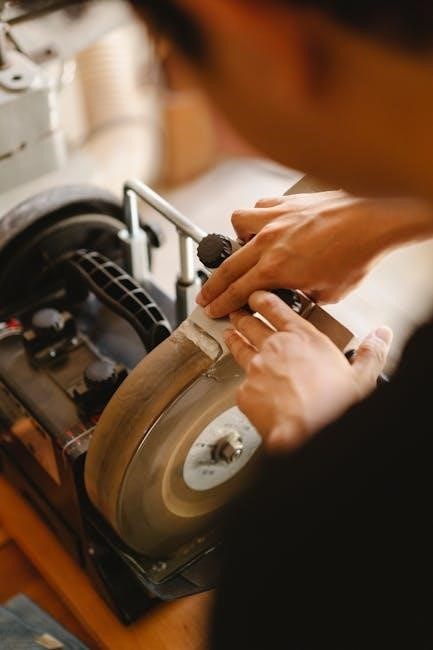
Prioritizing safety is non-negotiable when undertaking knife sharpening․ Always establish a stable and well-lit workspace, free from distractions․ Secure the knife firmly – whether on a non-slip mat or held with a dedicated sharpening vise – to prevent accidental movement during the process․ Maintaining a consistent grip is crucial․
Protect your hands! Consider utilizing cut-resistant gloves, especially when learning or working with particularly sharp blades․ Be mindful of your fingers’ position relative to the sharpening surface, keeping them well clear of the path of the blade․ Slow, controlled movements are far safer than rushing․
Proper disposal of metal filings is also essential․ These tiny particles can be surprisingly sharp․ Regularly clean your sharpening surface and carefully dispose of filings to avoid accidental cuts․ Finally, always store sharpened knives safely, using a block, sheath, or magnetic strip․
Knife Sharpening Methods
Diverse techniques exist for knife sharpening, ranging from traditional whetstones to modern electric sharpeners and manual pull-through systems, each offering unique benefits․
Whetstone Sharpening: A Comprehensive Guide
Whetstone sharpening, a time-honored method, delivers exceptional results, though it demands practice and patience․ Selecting the correct grit is paramount; coarser grits (e․g․, 400-1000) reshape a dull edge, while finer grits (3000-8000) refine and polish it․
An angle guide ensures consistency, crucial for achieving a sharp, even edge – typically between 15-20 degrees for most kitchen knives․ Begin with the coarsest grit, lubricating the stone with water or oil (depending on the stone type)․
Employ a consistent, sweeping motion, maintaining the angle throughout each pass․ Alternate sides, gradually refining the edge as you progress through finer grits․ Finishing with a leather strop further enhances sharpness, removing any remaining burr and creating a razor-like edge․ Remember, practice makes perfect!
Choosing the Right Whetstone Grit
Selecting the appropriate whetstone grit is fundamental to successful sharpening․ Coarse grits, typically ranging from 200 to 400, are ideal for repairing severely damaged blades, removing chips, or establishing a new edge angle․ Medium grits (800-1200) refine the edge formed by coarser stones, preparing it for finer polishing․
Fine grits (3000-6000) are used for achieving sharpness, removing scratches left by medium grits, and creating a refined cutting edge․ Extra-fine grits (8000+) polish the edge to a mirror finish, maximizing sharpness and edge retention․
Beginners often benefit from a combination stone with multiple grits, allowing them to progress through the sharpening stages efficiently․ Consider the steel type of your knife when choosing grit; harder steels may require coarser grits initially․
Using a Whetstone Angle Guide
Whetstone angle guides are invaluable tools for beginners, ensuring consistent blade angles during sharpening․ Maintaining a consistent angle is crucial for creating a uniform, effective edge․ These guides typically clip onto the knife spine, providing a physical reference point․
Common angles range from 15 to 20 degrees; Japanese knives often utilize a 15-degree angle, while Western knives typically benefit from a 20-degree angle․ Experiment to find what works best for your knife and intended use․
While guides offer assistance, relying solely on them can hinder developing muscle memory for angle control․ Practice freehand sharpening alongside guide usage to refine your technique and achieve optimal results over time․
Whetstone Sharpening Techniques: Step-by-Step
Begin with a coarse grit (e․g․, #400) to establish a new edge or address significant dullness․ Lubricate the whetstone with water or honing oil, ensuring even coverage․ Hold the knife at the desired angle, maintaining consistent pressure as you draw the blade across the stone․
Alternate strokes on each side of the blade, overlapping each pass․ Progress to medium grits (#1000) and then fine grits (#3000+) to refine the edge and remove scratches․ After sharpening, use a leather strop to polish and align the microscopic burr created during the process․
Remember patience and consistency are key; rushing can lead to uneven sharpening and a less effective edge․
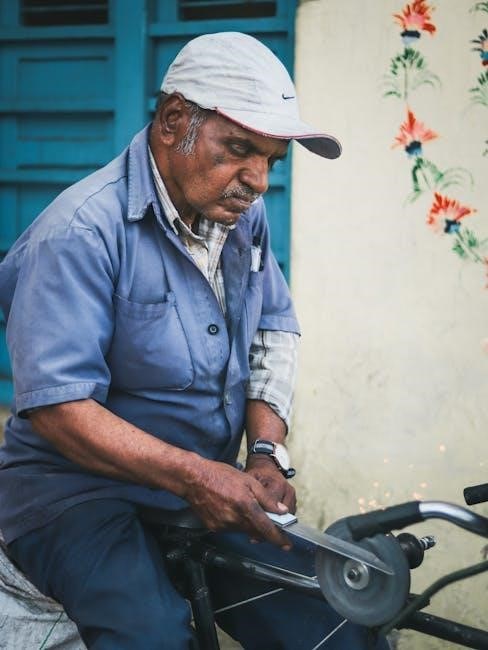
Electric Knife Sharpeners: Pros and Cons
Electric knife sharpeners offer convenience and speed, ideal for those seeking a quick sharpening solution․ They typically feature multiple stages, progressing from coarse to fine grits, automating the process for consistent results․ However, they can be aggressive, removing more metal than necessary, potentially shortening the knife’s lifespan․
A significant drawback is their inability to sharpen all knife types effectively, particularly those with curved blades or serrations․ Furthermore, some models lack the precision of manual methods, potentially damaging the blade’s angle․
While user-friendly, electric sharpeners often require a higher initial investment and may not deliver the same level of sharpness as skilled whetstone work․
Manual Knife Sharpeners: Pull-Through and Honing Steel
Manual knife sharpeners, encompassing pull-through models and honing steels, provide accessible sharpening options․ Pull-through sharpeners are compact and easy to use, employing pre-set angles for consistent sharpening, though they can be abrasive and remove substantial metal․ Honing steels, conversely, don’t actually sharpen but rather realign the blade’s edge, maintaining sharpness between sharpenings․
Regular honing—a few strokes before each use—is crucial for preserving a knife’s edge․ Honing steels are inexpensive and require minimal skill, making them ideal for daily maintenance․ However, they cannot repair a truly dull blade․
Choosing between these depends on sharpening frequency and desired precision; pull-through for occasional sharpening, honing steel for consistent upkeep․
Honing vs․ Sharpening: Understanding the Difference
Honing and sharpening are frequently confused, yet represent distinct processes crucial for knife maintenance․ Sharpening establishes a new edge by removing metal, correcting significant dullness or damage․ It fundamentally reshapes the blade’s profile, creating a fresh, acute angle․
Honing, however, doesn’t remove metal․ Instead, it realigns the existing blade edge, straightening microscopic imperfections that develop with use․ Think of a mohawk haircut – sharpening creates the initial point, while honing maintains its form, preventing it from flattening or curling․
Regular honing (several times a week) preserves sharpness, reducing the frequency of sharpening․ Neglecting honing leads to faster dulling, requiring more aggressive sharpening later․

Maintaining Your Knife Edge
Consistent maintenance, including regular honing and occasional sharpening, preserves a knife’s optimal performance and extends its lifespan, ensuring lasting precision․
Prioritize honing after each use to keep the blade aligned, delaying the need for more intensive sharpening procedures and maximizing edge retention․
The Importance of Regular Honing
Regular honing is absolutely crucial for maintaining a knife’s sharpness between full sharpening sessions; it’s a frequently overlooked, yet vital, aspect of knife care․
Unlike sharpening, which removes metal to create a new edge, honing doesn’t actually sharpen the blade․ Instead, it realigns the microscopic teeth of the blade that naturally bend and roll over with use․
Think of a mohawk haircut – sharpening creates the initial, defined point, while honing straightens the hair (or blade edge) that begins to fall or bend over time․ This realignment restores the blade’s cutting ability․
Honing with a steel several times a week, or even before each use, dramatically extends the time between necessary sharpenings, preserving the life of your knife and ensuring consistent performance․ A honed knife feels sharper because it is functioning more efficiently․
Neglecting honing leads to a quicker decline in sharpness, requiring more frequent and aggressive sharpening, ultimately shortening the lifespan of your valuable kitchen tools․
Leather Strop for Final Edge Refinement
A leather strop represents the pinnacle of edge refinement, taking a freshly sharpened blade to an exceptional level of sharpness and polish; it’s the final step for discerning knife enthusiasts․
Typically used immediately after whetstone sharpening, a strop utilizes a piece of leather, often charged with a polishing compound, to remove the final microscopic burr left by the sharpening stones․
Stropping doesn’t remove significant metal, but instead polishes and aligns the very edge, creating a truly razor-sharp and refined cutting surface․ The direction of stropping is crucial – always move away from the blade’s edge․
Many whetstone kits include a leather strop, demonstrating its importance in achieving professional-grade results․ Consistent stropping enhances the blade’s longevity and slicing performance․
While honing maintains sharpness between sharpenings, stropping elevates sharpness after sharpening, providing a level of finesse that’s difficult to achieve otherwise․
Types of Knives and Sharpening Approaches
Different knives demand tailored sharpening techniques; chef’s knives benefit from whetstones, serrated knives require specialized tools, and pocket knives need careful attention․
Sharpening Chef’s Knives
Chef’s knives, the workhorses of the kitchen, require consistent sharpening to maintain their performance․ Begin with a coarse grit whetstone (around 400-1000) to establish a new edge or correct significant dullness, holding the blade at a consistent 15-20 degree angle․
Progress through medium (1000-3000) and fine (3000-8000) grits, reducing the angle slightly with each step to refine the edge․ Employ even pressure and overlapping strokes, ensuring the entire blade length is sharpened․ Remember to alternate sides with each stroke to maintain symmetry․
After whetstone sharpening, utilize a honing steel to realign the blade’s edge between sharpenings, preserving its sharpness; A leather strop can further refine the edge, removing any remaining burrs․ Consistent practice and attention to detail are key to achieving a razor-sharp chef’s knife․
Sharpening Serrated Knives
Serrated knives present a unique sharpening challenge due to their scalloped edge․ Unlike smooth blades, they don’t “sharpen” in the traditional sense; instead, you’re reshaping or “re-crowning” each individual serration․ Specialized sharpening tools are highly recommended, such as a tapered ceramic rod designed for serrated edges․
Gently insert the rod into each scallop and draw it along the inside edge, maintaining a consistent angle․ Avoid excessive pressure, as this can damage the delicate serrations․ Work your way along the entire blade, repeating the process several times per scallop․
Alternatively, some diamond-coated sharpening tools are suitable for serrated knives․ Regular honing isn’t effective on serrated edges; focus on reshaping when they lose their cutting ability․ Patience and a light touch are crucial for successful serrated knife maintenance․
Sharpening Pocket Knives
Pocket knives, often used in diverse conditions, require regular sharpening to maintain their functionality․ Due to their compact size and folding mechanism, sharpening can be slightly more intricate than with larger fixed-blade knives․ A fine-grit whetstone is generally preferred for achieving a sharp edge, but dedicated pocket knife sharpeners are also available․
Carefully extend the blade and secure it․ Begin by establishing a consistent sharpening angle, typically around 20 degrees․ Work along the blade in smooth, controlled strokes, alternating sides with each pass․ Pay attention to the tip and heel of the blade, ensuring even sharpening․
After sharpening, use a leather strop to refine the edge and remove any burrs․ Remember to clean and lubricate the knife’s pivot point after sharpening to ensure smooth operation․
Troubleshooting Common Sharpening Issues

Addressing sharpening challenges—dullness, damage, or rolled edges—requires patience and diagnosis; proper technique and tool selection are crucial for restoring blade performance․
Dealing with a Dull or Damaged Blade
A severely dull or damaged blade demands a more intensive approach than routine sharpening; assessing the extent of the damage is the initial step․ For minor dullness, begin with coarser grit whetstones to quickly remove material and re-establish the edge․ However, chips or significant damage necessitate careful repair․
Start by gently removing metal around the damaged area, working towards a smoother, more consistent surface․ Avoid applying excessive pressure, which could worsen the issue․ Progress through finer grits, gradually refining the edge․ Patience is key; restoring a damaged blade takes time and precision․
If the damage is extensive, consider professional sharpening services․ They possess specialized tools and expertise to handle complex repairs․ Remember, attempting to fix severe damage without proper knowledge can lead to further complications and potentially ruin the blade․
Fixing a Rolled Edge
A rolled edge, where the blade’s edge curls over, significantly impacts cutting performance; it feels dull even if the edge isn’t truly worn․ Addressing this requires carefully removing the rolled portion of the steel to re-establish a sharp, consistent angle․ Begin with a coarser grit whetstone, applying gentle pressure and maintaining a consistent angle․
Focus on the area where the roll is most prominent, working in smooth, controlled strokes․ Avoid aggressive movements, as this can create further damage․ As you remove the rolled steel, gradually transition to finer grits to refine the edge and eliminate any remaining burrs․ Honing after sharpening is crucial to straighten the edge․
Regular honing prevents edges from rolling in the first place, extending the time between sharpening sessions․ Consistent technique and patience are vital for successfully fixing a rolled edge and restoring your knife’s sharpness․

Advanced Sharpening Techniques
Mastering sharpening involves consistent angles and understanding steel types; these skills elevate blade care, achieving professional-level sharpness and longevity for your valuable knives․
Creating a Consistent Sharpening Angle
Achieving a consistent sharpening angle is paramount for a refined and functional edge․ Many beginners struggle with maintaining this consistency, leading to uneven sharpening and a less-than-optimal result․ Utilizing an angle guide, as mentioned in several online resources, is a fantastic starting point, especially when first learning whetstone techniques․
However, relying solely on a guide can hinder developing the muscle memory needed for freehand sharpening․ Practice is key! Visualize the angle – typically between 15 and 20 degrees for most kitchen knives – and focus on maintaining that angle throughout each stroke․ A helpful trick is to imagine slicing a very thin layer off the stone․
Regularly check your progress by lightly dragging your thumbnail perpendicular to the edge; a consistent burr indicates uniform sharpening․ Don’t rush the process; slow, deliberate movements are far more effective than hurried attempts․ Remember, consistency trumps speed when it comes to sharpening!
Understanding Steel Types and Their Impact on Sharpening
Different steel types significantly influence the sharpening process and the longevity of a knife’s edge; Softer steels, commonly found in inexpensive knives, sharpen quickly but lose their edge faster, requiring more frequent maintenance․ Conversely, harder steels, often used in high-end knives, hold an edge longer but are more challenging to sharpen initially․
Carbon steel, prized for its sharpness, is prone to rust and requires diligent care․ Stainless steel offers corrosion resistance but generally doesn’t achieve the same level of sharpness as carbon steel․ Knowing your steel type dictates the grit progression and pressure applied during sharpening․
Harder steels benefit from slower, more deliberate sharpening with finer grits, while softer steels respond well to quicker sharpening with coarser grits․ Ultimately, understanding the composition of your blade allows for a tailored sharpening approach, maximizing its performance and lifespan․
Resources for Further Learning
Explore YouTube channels dedicated to knife sharpening for visual guidance, and join online forums to connect with experienced sharpeners and share knowledge․
Recommended YouTube Channels for Knife Sharpening
For visual learners, YouTube offers a wealth of knife sharpening tutorials․ Several channels stand out for their clarity and comprehensive coverage․ Burrfection is highly regarded, providing in-depth explanations of sharpening theory and technique, catering to both beginners and advanced users․ JKI (Japanese Knife Imports) offers excellent demonstrations, often focusing on Japanese knives and whetstone sharpening methods․
Another valuable resource is SharpGurus, which presents detailed guides on various sharpening systems, including whetstones, electric sharpeners, and honing steels․ These channels often dissect common mistakes and offer troubleshooting advice, helping viewers overcome challenges․ Many demonstrate techniques with different knife types, from chef’s knives to pocket knives, ensuring relevance for diverse needs․ Remember to always prioritize safety when attempting any technique shown in these videos․
Best Online Forums and Communities
Engaging with online communities provides a platform for asking questions, sharing experiences, and receiving personalized guidance on knife sharpening․ BladeForums is a long-standing and active forum with a dedicated sharpening subforum, offering a wealth of knowledge from experienced enthusiasts․ KitchenKnifeForums is another excellent resource, specifically focused on kitchen knives and their maintenance, including detailed discussions on sharpening techniques․
Reddit’s r/sharpening subreddit is a vibrant community where users post photos of their work, seek advice, and discuss various sharpening methods․ These forums often feature detailed threads on specific sharpening challenges, steel types, and equipment recommendations․ Participating in these communities allows you to learn from others, refine your skills, and stay updated on the latest sharpening trends and best practices․